How to Fix 403 Forbidden Error on Your WordPress Site
Websites require constant maintenance and updates to function optimally. Sometimes changing things, or even not changing things correctly, can result in errors on a website. In this post, you will learn what a 403 Forbidden Error is and how to quickly fix it.

What does a 403 forbidden error mean?

Requests you make to a server can return a variety of status codes. One such status code is 403. The 403 Forbidden error basically means that the server understands your request, but is denying users access to a certain resource on your website. Providing more information about the reason for the requested ban is up to the servers.

What can cause a 403 forbidden error?

There are many things that can cause a 403 error. However, the three most common reasons that can result in a 403 error are:
  • a damaged .htaccess file
  • wrong file permissions
  • installed plugins
Incorrect file permissions are another reason that can cause a 403 error. Files and directories on computer systems have certain permissions assigned to them. This prevents people from reading, writing, or executing a file that they don't have access to. It's important to keep sensitive files protected, but files and directories that are part of WordPress need to have permissions assigned in such a way that they meet the basic minimum requirements.

How to Fix a 403 Forbidden Error

In this section, we will learn how to fix the 403 Forbidden error, either by restoring our  .htaccess file or by setting the proper file permissions.

How to repair a damaged .htaccess file

It is possible to modify the .htaccess file of your WordPress installation in three different ways. Sometimes WordPress core modifies it, and other times some plugins make changes to this file. It is also possible that you have manually made changes to it. In any case, the easiest way for beginners to get rid of a 403 error caused by a .htaccess file is to remove the old version and force WordPress to generate a new one. Make sure to create a new backup of the old  .htaccess file before you delete it. Save it locally on your computer or somewhere else. If generating a new  .htaccess file doesn't resolve the error, you can simply reload the new backup and continue to the next step. You should see a .htaccess file once you've logged into the root directory of your website in your FTP client. Right-click on it to download a local copy first, then delete the file. Now try to visit your website. If it opens successfully, this means that some rule within the  .htaccess file was causing the error. In this case, you can generate a new  .htaccess file by simply going to the WordPress admin panel, then navigation to Settings > Permalinks and click Save Changes

Setting the correct file permissions

Specifying the correct value for file permissions allow you to keep your website secure while providing access to the users who need it to keep things running smoothly. The general rule of thumb to keep in mind is to start with restrictive permissions and then increase them until things start working. Fortunately, we don't need to do all of these tests to determine the correct permissions for our WordPress website. Within our WordPress installation, you can set permissions for all directories in 755and permissions for all files in 644. This should fix any 403 errors that arise due to incorrect file permissions. The meaning of permission numbers, such as the 755, is explained in more detail in the official WordPress documentation. There are free FTP clients, like FileZilla or WinSCP, that you can use to set these permissions on different files and directories recursively. You can check the current permissions of a file or directory by right-clicking on its name and then selecting File Permissions from the context menu. This should bring up a dialog that shows you the currently applied permissions and asks if you want to recursively apply them to different files and subdirectories.

Disable all plugins

Creating a new  .htaccess file or setting the file permissions correctly fixes the 403 Forbidden error problem for most users. One more thing you can try, in the unlikely event that the error is still appearing, is to disable all plugins. A poorly coded plugin or incompatibility between different plugins, among other things, can also result in 403 errors. Once all the plugins have been disabled, check if the website is still showing a 403 error. If the website is now loading, it means that one of the plugins is causing the 403 Forbidden error. Now start activating the plugins one by one to see when the error occurs again. This will tell you which plugin is causing problems, and you can contact its developer to fix the error or install an alternative plugin instead.

Final thoughts

In this post, we have covered the three most common issues that can lead to a 403 Forbidden error in WordPress. Hopefully one of them will fix your problem. You should consider contacting your web host if the error persists. Your provider might suggest other things you can do.  
Read More
How to create a social network with WordPress and BuddyPress from scratch
Do you want to create a social network with WordPress ? where users can interact with each other, post statuses, upload photos, and much more? Well, today I explain how to create a social network with WordPress and BuddyPress. Do you know? WordPress is beautiful CMS, where you can make almost all the types of websites you can imagine. Because I imagine that something will resist it. But luckily, creating a social network is not among the impossible of WordPress and it can be done perfectly easily. Among the thousands of plugins that exist and that you can install in WordPress, there is one that turns your website into a social network with all the typical components that any site with these characteristics needs. That plugin is BuddyPress, and you can download it for free from the WordPress repository. It is currently installed on more than 200,000 websites and is regularly updated to improve its functionality and always be up to date with the latest versions of WordPress. Come on, in a nutshell, BuddyPress is a gem in the rough to create a social network with few resources. Let's see, do not think that you can create a social network like Facebook, because there is a lot of investment behind it and it is much more complicated to create something so big, but with BuddyPress, you can do very cool things and attract your audience to participate in it, share content, comment on the profile of your friends, and all those little things that are done on social networks. How to create a social network in WordPress from scratch step by step... Since I don't know what level you are at, dear reader, I am going to explain all the steps to create a social network from scratch. That is, starting from the basis that you have absolutely nothing: no domain, no hosting, no knowledge of WordPress, no nothing. If you already have all that, congratulations! You are more than halfway done and you can jump right down to the section where I explain how to install and configure BuddyPress. Otherwise, we continue! The first steps to creating a social network are exactly the same as the steps to creating a blog and I have already commented here. so I will briefly explain what each of them consists of. Search for a domain... Here I explain what a domain is, but to summarize, it is the name that your social network will have followed by the extension “.com”, “.net”, “.es” or whatever. In the case of Youtube, its domain is “youtube.com”. It can take several hours of thinking, brainstorming, discarding names, and especially importantly, checking that the domain is free. Because it is useless to come up with the best name in the world if the domain is already being used by another website. Although all extensions are good for creating your social network, the most used and remembered is ".com", so it is recommended that you choose a name that has this free extension. When you have found a name that you like and it is free, it is time to move on to the next step. Hire the hosting... Read more or you can buy hosting from us..... Shared Hosting BDMic Creating a social network with WordPress is free, but for it to work well (without crashes or interruptions, with security measures, with high speed, etc.) you have to host it on a good web server. As many photos and videos are uploaded on a social network, you will need a hosting that has enough disk space. I recommend you start with this shared hosting in the first steps of your site If over time the website grows and becomes too small for you (hopefully, right?) you will migrate it to one with greater capacity or to a private one. When you go to install it, it will tell you to enter a domain for your website. This is where you will have to write the domain that you had thought of in the previous step and they will leave it for free for the first year. 
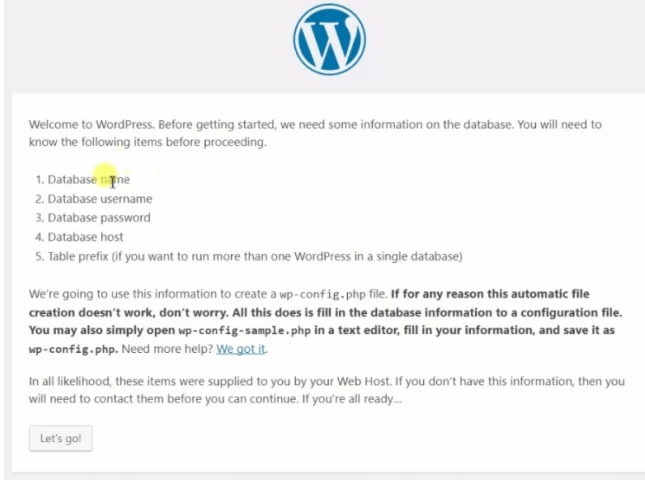
Install WordPress... Perfect, you already have your domain and your hosting ready to install the website that in the following steps will become a social network. So now it's time to install WordPress, the most widely used content management system in the world that allows you to create almost any type of website. WordPress has a lot of great things, but the best of them is that it allows you to create a website in a matter of seconds without having to touch a single line of code. Its installation can be done manually, but if you don't want to complicate your life too much, you can use the automatic installation offered by the hosting you just contracted. Follow the Steps- 1. Install a template: BuddyPress themes 2. Install and configure BuddyPress 3. How BuddyPress Works: Search on Google. 4. Plugins for BuddyPress (extensions) Well, as I said at the beginning of this post, there are tons of plugins that allow you to add new features to BuddyPress that you may be interested in depending on the social network you want to create. I am going to show you some of the plugins that I find most interesting: BuddyPress Activity Plus adds the function of sharing in any publication that is made on the social network. Something similar to what Facebook has to share. Events Manager – This allows users to create public events and have their friends RSVP. BuddyPress follow: implements a system similar to Twitter, in which a user can follow another without the need for the latter to confirm their friendship. iFlayChat: is a chat so that users can chat with each other, make video calls, etc. rtMedia: adds an extra tab in the user's profile and in groups that allows uploading images, albums, etc. It is expandable with paid addons that allow you to do many more things. BuddyPress Activity Privacy – This allows you to add levels of privacy to posts. Each user will be able to choose who can see their posts, Facebook-style. These are some of the free plugins that exist and that you can download from the WordPress repository. WELL DONE, As always, if you have any questions you can ask me in the comments and I will answer you as soon as possible.
Read More
How to build a wordpress website offline without internet

There are so many advantage in building a wordpress site offline. These tutorial we will guide how to build a wordpress website offline without internet. You can modify files and pages more faster and effectively than using cpanel or any other web hosting control panel.

Wordpress is very fast and easy to install. So developers build their wordpress site offline first and then upload them to a live server. For that they use their own computer and make a virtual environment to host the website. There are also other benefits of making website offline. You may not have internet, slow internet, you're travelling or on the road but still you can build your website offline.

If you have Xampp installed before on your computer or laptop and you downloaded the core wordpress then anytime you can use them to build a website. For that you need not a live web server or web hosting. Even starters use that method for testing and learning.

Let's begun, You might hear about Xampp. Xampp stands for Cross-Platform(X), Apache(A),MariaDB(M), Php(P) and Pearl(P). It will active virtual environment on your computer and you can work on a website without putting the files and databases on internet.

At first you have to download Xampp for their Official Website. You can download 7.4.14/php version as most of the wordpress themes and plugins work very good with php 7.4. Then run the installation.

Mark all the components and go next.

Here should be a installation folder. You can go next or can choose a different folder. Choose the language. Click next and install it on your pc.

Now open the installed Xampp and start apache and mysql by clicking start.

If you had downloaded wordpress before extract them on a folder of your pc. Otherwise download the latest version 5.9 from wordpress official website.

Move the folder on Windows(C:)>Xampp>htdocs. Rename the folder as you want.

Now go to a browser and type localhost/testsite and click on Let's go. It will ask you for database information.

Now go to a new tab and run localhost,/phpMyAdmin. Create a new database and new user.

Connect them and note the database information like user, db name, password. Put them on your wordpress installation and run the installation. Wordpress is now installed. You can login to your wordpress admin panel by visiting localhost/testsite/wp-admin.

Read More
0
    0
    Your Cart
    Your cart is emptyHome
    linkedin facebook pinterest youtube rss twitter instagram facebook-blank rss-blank linkedin-blank pinterest youtube twitter instagram